Showing posts with label how to. Show all posts

Tuesday, September 3, 2013

Pillow Pattern From Plastic Bag

I stitched up a couple of pillows for my daughter using the plastic bag for my pattern.  It's a quick and easy way to make pillows, especially if you have an aversion to putting in zippers like me!  Here's how...
 
For two small lumbar pillows you'll need about 3/4 yard of fabric.
 
 
Take the pillow bag...


...And place it on your fabric.  Measure along the length (width) of the bag and add about 2" for folding over.  Cut one of these as the front side of your pillow.  (You don't need to add any extra inches for seam allowance.)


Cut a second piece exactly the size of the bag (this will be the back side of your pillow).

Take the front piece of your pillow and iron down about a 1/2" on three sides (the two long sides + one short side).


After ironing, it should look like this:


Take both pieces (the front and back of your pillow) and pin them, right sides together.  It should look like this, with the front side longer than the back:

 
Sew the two sides together, along the two long sides and the one short side, leaving open the end where the front of the pillow is longer than the back.


Trim the two ends where the stitches intersect each other, so that when you turn your pillow right side out, your corners will be nice and pointy.

 
Close up of corners once turned right-side out:
 
 
Iron down about a 1/2" on each side of your exposed flap:
 
 
Fold your flap over like this:

 
Stitch down your flap:


Stuff your pillow (it's going to feel too tight but be patient because it should end up fitting beautifully) into your case, folding the flap down over the end:
 

Finished:

 
You can also make a pillow, again using the plastic bag as your pattern, this way...
 
Cut one piece of fabric the exact length and width of the plastic bag.  Cut a second piece of fabric the size of your bag and add about 3" to the width.
 
Take the wider of the two pieces and cut it down the middle.  Create a hem (iron and stitch) along the line you cut.  You will then have three pieces that look like this:

 
Pin and stitch pom poms or other piping along the right side of your smaller piece of fabric (what will be the front side of your pillow).
 
 
Pin and stitch the two back pieces of your pillow to the front side (right sides together); the two back pieces will overlap each other, like this:
 

While your pillow is still wrong-side out, trim all four corners so that they'll be pointy when turned right-side out.
 
Turn your pillow cover right-side out...
 
 
...And then stuff your pillow inside it.
 
 
Ta-dah!
 
I was secretly kinda hoping Natalie wouldn't love them once I took these pictures and saw how nicely they coordinate with our living room!  Turns out she does love them so they're on their way to her place in Philadelphia.
 
 
 Hope you find this plastic bag pattern tute helpful, and hope you have a great day!

Tuesday, July 24, 2012

Secrets to Cleaning Vintage Linens

I was busy yesterday, laundering some of my vintage, crocheted doilies and tablecloths.


I'm asked from time to time about the best way to clean vintage linens and though I'm sure many methods exist, these are my secrets for transforming cruddy linens into lovely linens...

For lightly stained or discolored linens I submerge them in water, pour lemon juice over them and liberally sprinkle them with salt.


I hang them in the sun for a few hours, letting the sun, lemon and salt work their magic.


Then I rinse them and hang them to dry and waalah!


My "secret soak" is required for heavily soiled linens.  First, I heat up a few gallons of water on the stove.  I want the water really hot, but not quite boiling.


While the water heats up, I pile the dirties into my favorite galvanized tub (just about any container will do, even a sink)...


...and collect the rest of my supplies:  For each gallon of water, 1 cup of Borax powder and 1 cup Oxyclean powder.


I sprinkle the detergents into my tub, pour the hot water in and mix the water well, using an old wooden spoon, until the soap is well dissolved.  Then I drop in my linens and let them soak for about two days, stirring them a couple of times each day.


Then I rinse my linens.  It normally takes three really good rinses to get out all of the detergent suds but if that doesn't get them all out, I'll add 1 cup of distilled vinegar to 1 gallon of water, swish the linens around a bit and rinse with water a final time.  Lastly, I'll hang them to dry.

Bright, free from discoloration and stains ~ clean!


If you're going to give my methods a try, please take a few minutes to spot test your linens to ensure they won't be affected, after all, many of these vintage linens are quite delicate.

Any of you out in Blogville in need of a generous stash of vintage linens?  I have these to give away for free (you cover the postage please)!


I've laundered most but not all of them.  Many are in pristine condition but some are damaged and should work for your projects.  It's a collection of doilies (most handmade but a few factory), dresser scarves, pot holders, kitchen scrubbers, etc.).  There are probably at least $100 worth of vintage linens here.


If you'd like these, please shoot me an email at Cindy@RetroRevival.Biz and let me know.

Update:  Dani reached out to me first and I'm sending her these goodies ~ I'm sure she'll make very good use of them!

And don't forget about my July blog giveaway ~ these sweet, vintage salt & pepper shakers.


Share a comment on any or all of my July posts and you're automatically entered to win.  Drawing is July 31st.
 

Thursday, July 7, 2011

Insulated Flat Iron Travel Case


Don't you hate in when you have to wait around for your flat iron/straightener/curling iron/crimper to cool off before you stow it back into your bathroom cabinet or in your suitcase so that it won't burn yet another counter surface, brush, comb, clip or the contents of your suitcase?  Grrr!

Well wait no more!  The solution is a pretty and practical Retro Revival flat iron case that's insulated and heat resistant up to 500 degrees F (260 degrees C) so you can simply unplug your appliance after use and directly slip it into the case!

A few more details about my cases:
*Made to fit flat irons, curling irons, straighteners and crimpers
*Heat resistant lining is safe to 500 degrees F (260 degrees C)
*Horizontal case measures 5" W x 14" L with flap cover and velcro closure
*Large pocket on the backside, designed to hold your clips, combs and brush
*Ideal for travel, the gym, your bathroom cabinet, school, anywhere
*Perfect gift for your friends who have everything!

Here's my tutorial, really more tutorial-ish, on how I made them in case you want to give them a try:

Supplies:
Pretty fabric
Batting
Therma Flec fabric
Double bias tape
Velcro
Thread, scissors & sewing machine

Directions:
1.  Cut 1 each of your pretty fabric, insulated fabric and 2 pieces of batting into 5 1/2 " x 17 1/2" rectangles (these will become the back and flap front).
2.  Cut 1 each of your pretty fabric, insulated fabric and batting into 5 1/2" x 10 1/2" rectangles (these will become the front pocket where you slip in your flat iron).
3.  Cut 1 each of your pretty fabric into 5 1/2" x 6 1/2" rectangle (this will become the back pocket).


4.  Sew your Velcro onto the inside flap of the back piece of Therma Flec and onto the front of the front pocket:


5.  Sew your double bias tape to the top edge of your back pocket.
6.  Pin together your front pocket (the 10 1/2" rectangle), matching batting and Therma Flec pieces and sew the top edge of all three together with the double bias tape:

7.  Lastly, pin together your "back" pieces, the 14 1/2" pieces of Therma Flec, batting and pretty fabric...

...to the back pocket and the front pocket and attach them all together by sewing your bias tape all the way around the edges.

Ta da!  This is what your case should look like when open:

And closed:

And the back pocket:


Now, if you're not the crafty type but think these are the perfect travel accessory for the gal who considers her flat iron (or straightener, crimper or curling iron) an essential part of her beauty routine, then you can find 15 different models on Retro Revival.

And don't forget this month's blog giveaway ~ over $200 worth of goodies from Retro Revival and J&O Fabrics, including this Insulated Flat Iron Travel Case. 

Click HERE to read the details on how to enter!

Tuesday, April 26, 2011

We Made a Tufted Headboard!


Recently, Captain Project (formerly known as Mr. Wonderful ~ he asked me to change his name) and I visited our daughter in Atlanta.  Our "parents weekends" began a few years back when Natalie was at the University of South Carolina (go Cocks!).  Five years after her graduation, and now that she's back in the ATL, we continue our parents weekend tradition.

We celebrated Natalie's birthday.  Can hardly believe my youngest:

(On her first birthday, two days after she first walked!)

...Just turned 27!


We celebrated Captain Project's birthday too, by throwing a big bbq ~ good times.

Natalie and her BF in the kitchen pre-party:


Cooking potato salad and deviled eggs in our Retro Revival aprons:


Our friend Alli made the ah-mazing birthday cheesecake:


Captain Project bbq'd just about a pig's worth of brats and a several chickens:


The next day we got to work creating Natalie's tufted headboard.  Our inspiration:

(Photo courtesey Decopad.com)

Supplies:
Peg board
1x4 board
Foam
Batting
Fabric
Spray adhesive
Upholstery thread
Upholstery needle
Buttons for tufting
Buttons for backing
Staple gun

Instructions:
1. Cut peg board, foam and batting to fit the size of your headboard and into the desired shape
2. Cut 1x4 into four equal pieces
3. Cut 1x4 pieces lengthwise at a 30 degree angle
4. Attach 2 of the 1x4 pieces to the back of the pegboard and 2 to your wall; this will allow you to simply sit the completed headboard on the wall securely and to easily remove it later


5. Determine the number of tufts you will create and mark where you will thread the buttons on the back of the board (we used 54 for her queen bed)


6. Glue your foam to the peg board (rather than spend $20.00 per yard for upholstery foam, we used an "egg crate" matress pad that cost $10)


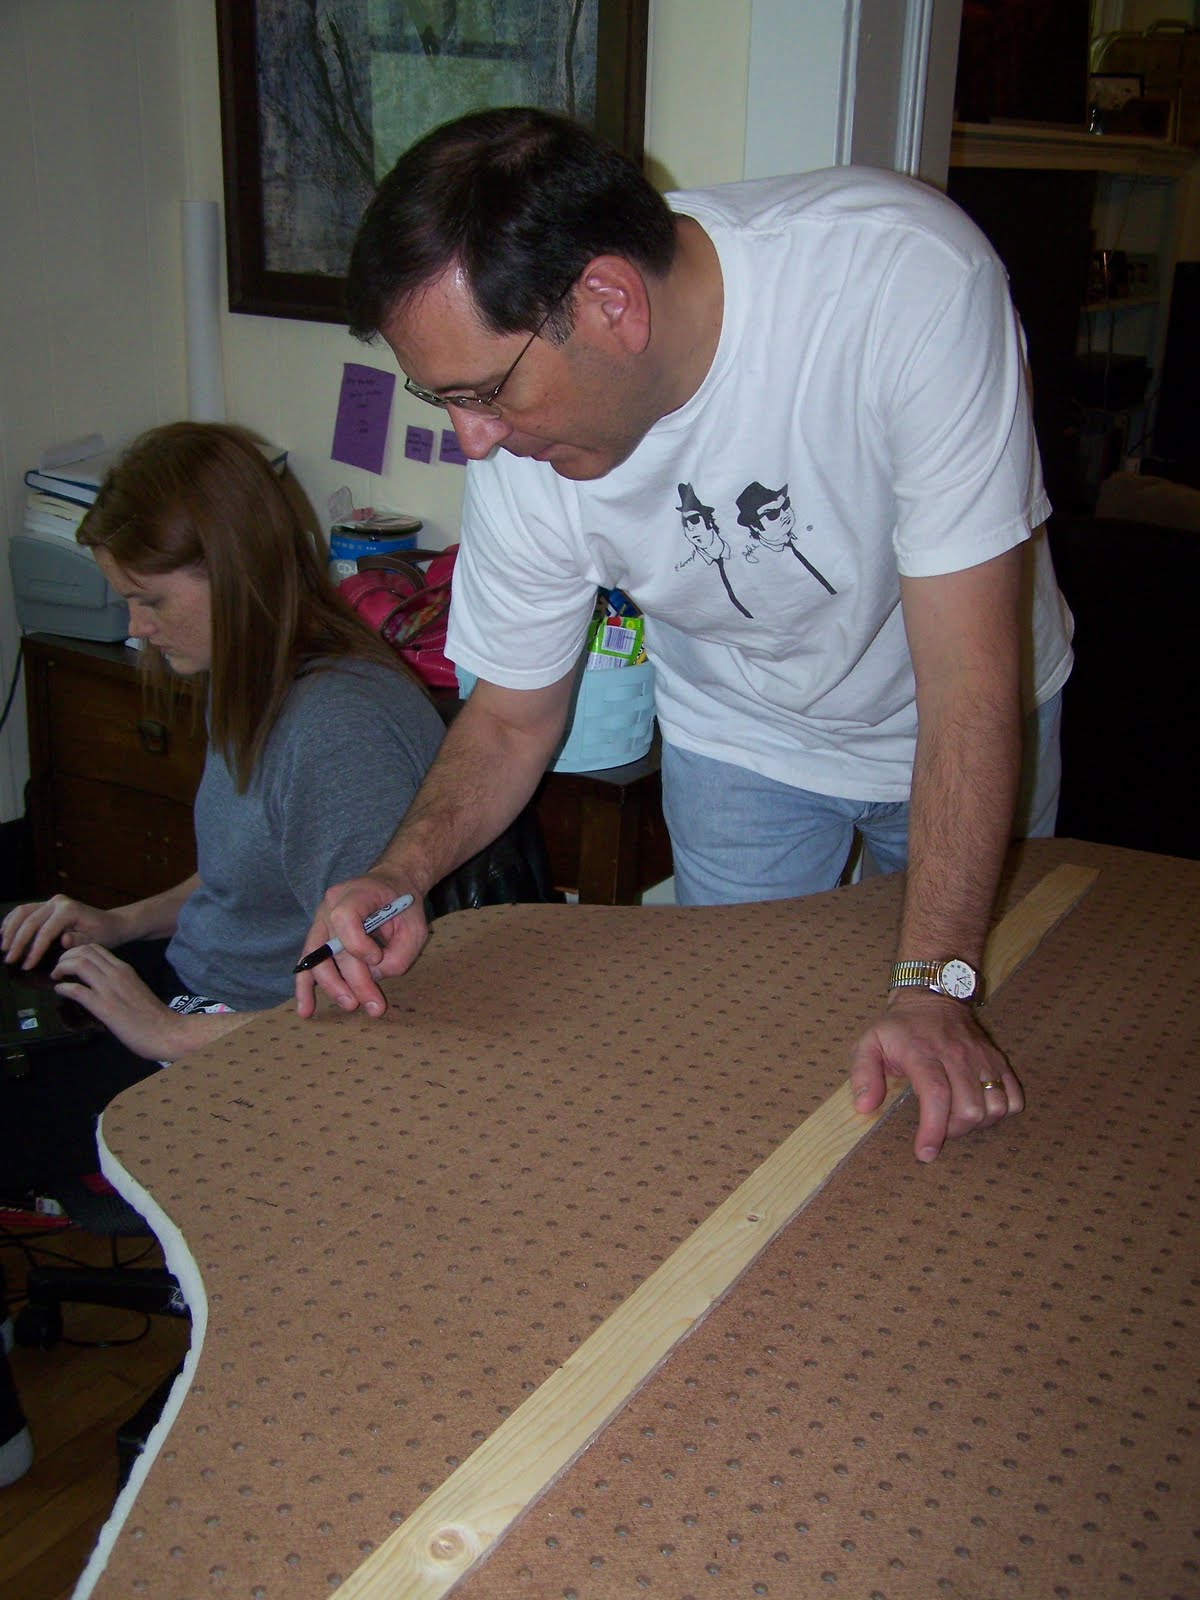
7. Lay the headboard on a flat work space (we used a small desk to save our backs from bending down to the floor) and begin layering on desired thickness of batting


8. Using the needle, thread it through your marked holes, up through the layers and slice an X on top of the layers (this allows your buttons to tuft deeply)


9. Cover your buttons


10. Next, lay your fabric on top and thread your first button through the center middle hole, working outward, completing the row and then moving up and then down until all rows are completed
11.  Secure the buttons to the back with small, flat buttons and knotting three times


12. Trim away any extra/too much batting, but leaving enough to ensure the edges of the peg board are quilted then pull tightly around to the back and staple securly


13. Hang completed headboard on your wall and dream sweetly!

So, those are the "official" directions.  Now, for the REALITY!

This was THE most difficult project I've ever tackled!  Uh-muh-guh!  A record number of curses were uttered (OK, shouted!), our thumbs are still sore, and it seemed to take FOREVER!

The good news is that about two hours into the tufting, we got a clue on how to make the nightmare easier.  Here are our tips...

Before tackling this project, you MUST have help ~ two people are absolutely necessary!

We found working on the floor was back-breaking and neck-wrenching...


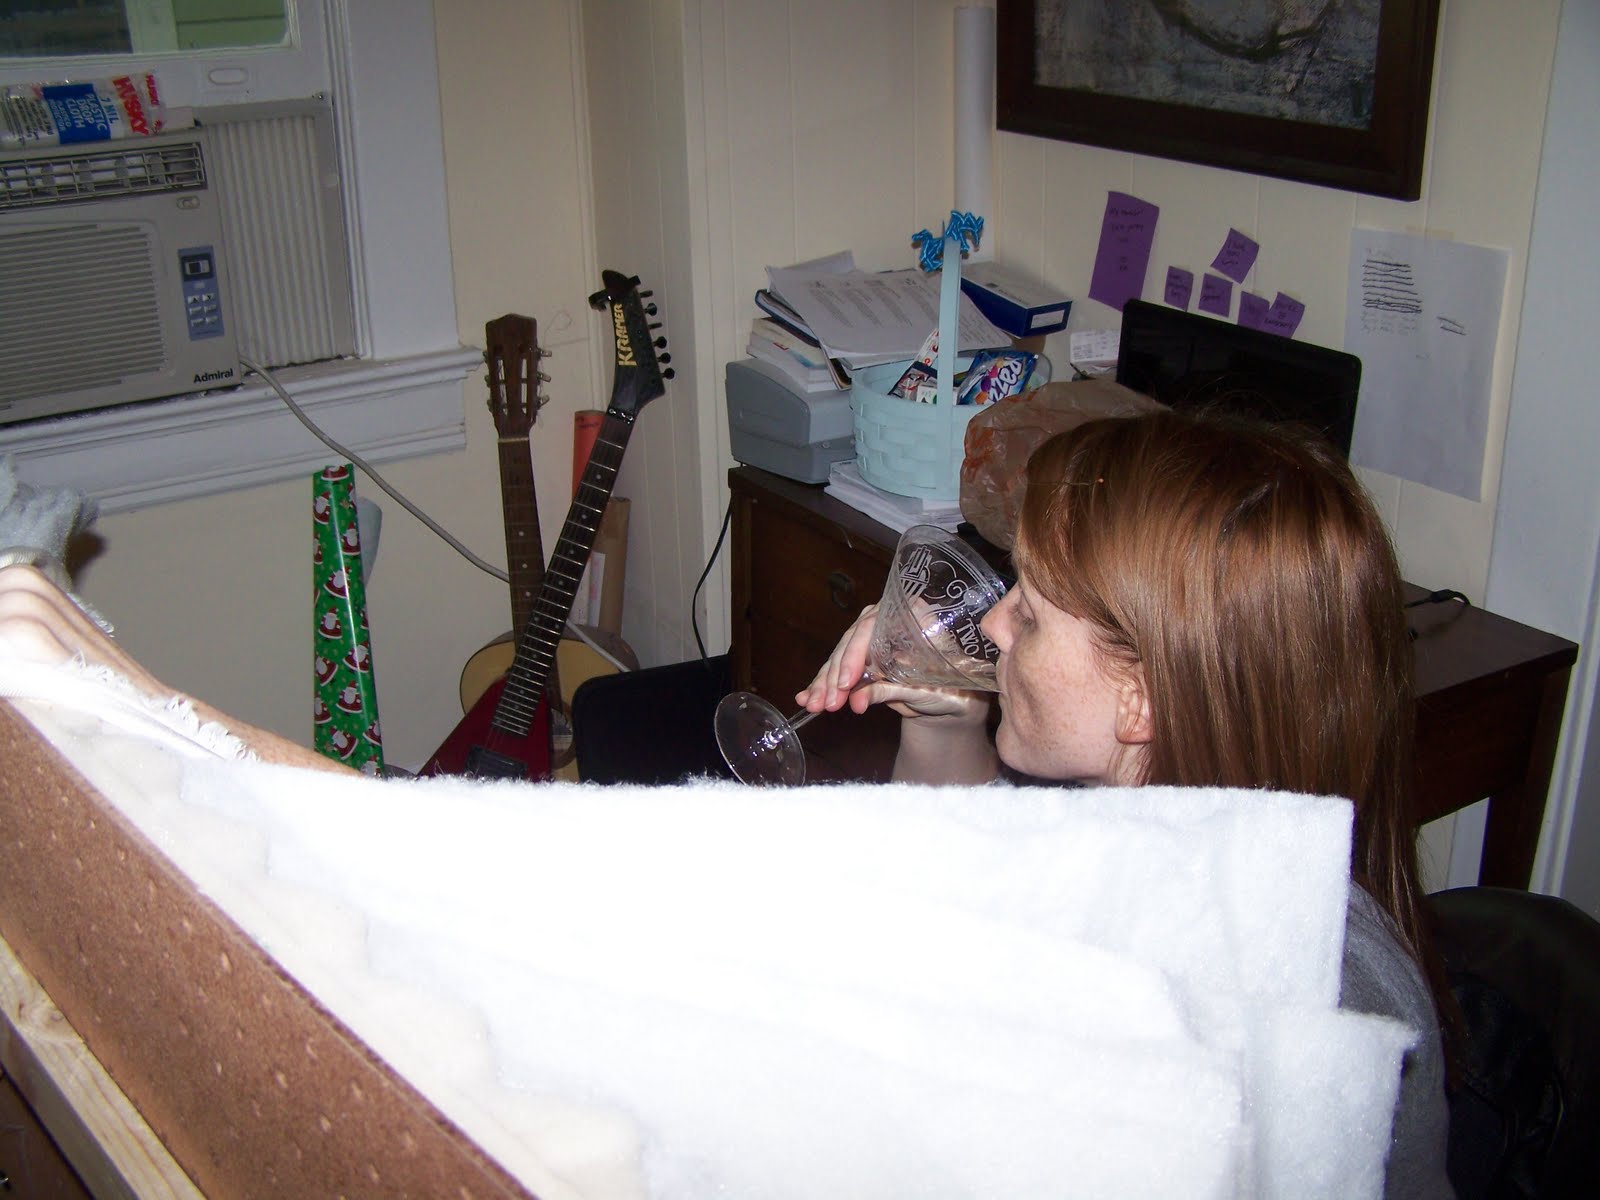
...So we stood the headboard between us, allowing us to sit comfortably.

Tufting seems easy, you simply thread a needle and thread through a hole, thread a button, and go back through the hole, right?  NOT!  We found it nearly impossible to blindingly get the needle back through the hole!  I say blindly becasue of all of the fabric, batting and foam that lays atop the peg board.

We finally realized that we should peel back the layers as we brought the needled back down and through to the back of the peg board.  (But don't skip the glue part, you'll want the adhesion throughout the project; and it peels back and reattaches easily.)
Once we figured this out, the project was significantly easier and no longer mind-blowingly frustrating. 

Here's how we did it:

I sat on the back side and threaded the needle through to the front


On the front side, Natalie peeled back the layers...


...Where she could see the hole and thread the needle through the layers, thread the button and then thread the needle back through to the back side:


We sipped cocktails while tufting ~ it was purely medicinal and reduced our stress!


Ultimately, this project took us about 9 hours:


Follow our tips and you should be able to hammer it out in about 4.  It was well worth it ~ look how pretty it is!


If you've made a tufted headboard, I'd love to hear from you!  Share your comments here and you're automatically entered to win this month's blog giveaway...


...A Retro Revival shower cap of your choice ~ yay!  Drawing is April 30th.