Showing posts with label retro apron. Show all posts

Thursday, October 25, 2012

Apron Giveaway!


Today I'm thrilled to have a generous guest post from one of my favorite bloggers, Heather of The Vintage Sheet Blog, a community she hosts to encourage creative women and support their small businesses.  She lives at the beach (lucky!), successfully balancing family, working with special needs children, blogging and crafting.

I hope you all will Go!  Visit her blog ~ you'll love it.  Please also visit her Etsy shop, Facebook page, Twitter, and Pinterest.

Hi, I'm Heather Grow, the girl behind the curtain (or sheet?) of The Vintage Sheet Blog.  I live in Huntington Beach, California.  I love collecting vintage linens but I also love baking, so I'm super excited to bring all of you Retro Revival ladies a fun recipe for an easy dessert.


Orange Margarita Squares
Serves 15
You’ll need:
For the Crust
1 cup crushed pretzels
1 stick of butter
¼ cup brown sugar

For the Creamy Margarita Layer
½ cup thawed frozen margarita mix
16 oz. cream cheese
2 cups Cool Whip or fresh whipped cream

For the Orange Layer
1.3 oz. box of orange Jell-O
½ cup boiling water
10.5 oz. can of mandarin oranges, frozen
2 cups of Cool Whip

The Crust
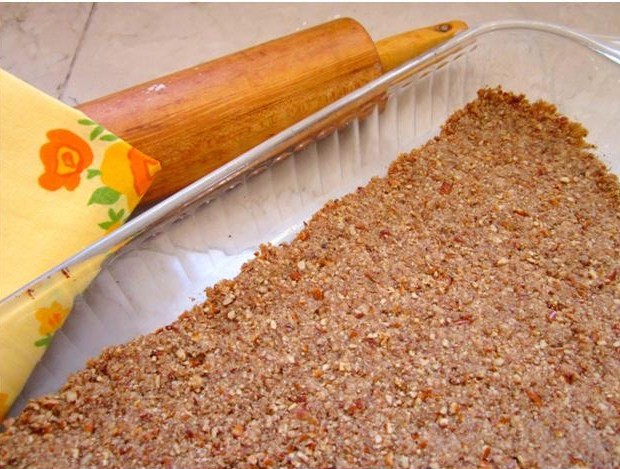
Combine crushed pretzels (I used the rolling pin and Ziplock trick), butter, and brown sugar. Press into the bottom of a 9 x 13 pan.  Bake in a 350 degree oven for 10 minutes or until slightly brown.  Let cool.


Creamy Margarita Layer
Combine the ½ cup margarita mix with the cream cheese.  Fold in the Cool Whip.  Spread evenly over the crust.


Orange Layer
Mix Jell-O with boiling water and stir until dissolved.  Add the canned oranges and stir to combine.  (*Just a note, the first time I made these my oranges were not frozen so I had to chill this mixture in the freezer for about 15 minutes.)  Allow this mixture to set slightly for 5 minutes, then, fold in Cool Whip and spread over creamy layer.


Refrigerate 2-3 hours to set.  Slice into squares and enjoy.  They are creamy, refreshing and the perfect refreshing dessert.


Do you like my apron?  I made it from a vintage pillowcase using Betz White’s 10 minute pillowcase apron tutorial.  Guess what?  I made one for one of Cindy’s readers so you can wear your apron when you make your Orange Margarita Squares.


Thank you for guest-blogging, Heather.  This recipe looks delicious, especially for us since it's everlasting summer here in Florida.  The apron you made is as sweet as you and the Margarita Squares!  You're so generous to give it away to one of my wonderful blog followers!

Enter to win:

Pin it
Share it on your Facebook page
Tweet it
Blog about it

Do 1 or all 4!

Leave a comment telling me how you shared it and I'll enter you to win.  I'll randomly draw a winner on Sunday night, October 28th.  Good luck!
 

Tuesday, July 5, 2011

Doozie of a Giveaway for July!


I'm beyond excited to announce this month's blog giveaway!  Retro Revival is partnering with J&O Fabrics to give away over $200 in products and gift cards ~ woo hoo!

Here is the breakout of prizes...

FIRST PLACE
A $50 gift card from J&O Fabrics


PLUS

This "Classic Kitchen" Retro Revival Waist Apron


PLUS

This "Dance With Me" Retro Revival Insulated Flat Iron Travel Case


PLUS

This "Retro Ladies" Retro Revival Waterproof Washable Shower Cap


SECOND PLACE
*A $20 J&O gift card +
*The "Classic Kitchen" Waist Apron

THIRD PLACE
*A $15 J&O gift card +
*The "Retro Ladies" Shower Cap

FOURTH PLACE
*A $10 J&O gift card +
*The "Dance With Me" Flat Iron Travel Case

Quite a booty of prizes, right?!

Here's what you need to do to enter...

Step 1:

Step 2:
On J&O's Facebook page, upload a picture of your favorite retro- or vintage-inspired creation or project.  If you don't sew, NO WORRIES!  Upload a picture of you modeling your favorite Retro Revival accessory or upload a picture of your favorite Retro Revival product.

Step 3:
Become a "follower" of J&O's blog and this blog (if you're not already).

Now here's how we'll determine the WINNERS...

On J&O's Facebook page, we'll be closely following the pictures you upload.  The more "Likes" you photos get, the better!  The most "liked" photos will win!

I'm really hoping that this big giveaway will be fun for everyone and that it will ultimately help me grow my business.  For those of you not too familiar with blogging and Facebook, the more followers on my blog and the more "likes" on my Facebook page, the more exposure my business gets, and hopefully, more sales!

So please enter ~ it's easy and fun!  And please share the news of my giveaway with your friends and family ~ surely they'll want to enter for a chance to win too!

Good luck to you all.  I've got my fingers crossed that one of you, my loyal blog followers, will WIN!

Tuesday, March 22, 2011

The Meatball - Perfected!


Years and years ago, a friend's mother, Lucille, a first generation, American-born Italian, taught me how to make red sauce from scratch.  All these years later, I still make it and still think it's the best (I've tweaked it a bit, but it's still basically her recipe).  She's passed now, I miss her and I often wish I had learned from her how to make meatballs too.

Every since then, I've been on an unending quest to make the perfect meatball.  Over the years, I've learned some secrets, like using pork and beef, and freezing the meatballs for 30 minutes before frying them so that they don't fall apart or lose their roundness.  The flavor of my meatballs has been delicious but something about the texture has been wrong.

Roma tomatoes were on sale this week so I bought a bunch and decided to make homemade sauce and give the meatballs a try, for the 1,000th time.  Again, I trolled the Internet and stumbed upon this recipe (I've crossed out the original ingredients/directions and put the changes I made in parenthesis):

RAO'S MEATBALLS (Makes 14-16)
Ingredients:
1 1/2 lb ground beef (1 lb)
1/2 lb ground veal  (no veal)
1 1/2 lb ground pork (1 lb)
3 large gloves garlic, minced
Salt (about 1 tsp)
Pepper (about 1 tsp)
Parsley (1 tb dried)
2 eggs
1 1/2 cups water (1 cup)
1 1/2 grated Percorino cheese (1 cup parm)
1 cup plain breadcrumbs (Italian)


Directions:

1. In a large bowl, combine the meats together and rub the garlic into it.  Press the meat down in the bowl then add, in this order, the salt, pepper, parsley, eggs and water.  Then sprinkle the chees over the top as if you're going to cover the water.  Finally, sprinkle the breadcrumbs over the cheese.
2.  When you start to mix it all together, mix with your hands, from the outside of the bowl to the middle and fold it in.  After the ingredients are mixed, roll the meat into balls.
3.  After your meatballs are rolled, take a frying pan (big teflon pot) and add oil and heat.  Place a clove of whole garlic in the frying pan (pot); when the garlic starts to brown, the oil is ready.
4.  Fry the meatballs, cooking and flipping each side until golden brown, about 4 1/2 to 5 minutes on each side.  Remove the meatballs after cooking and place on a plate with paper towels to absorb the oil.  (You can bake the meatballs in an oven on a lightly greased sheet at 350 degrees - the taste is totally different from frying.)

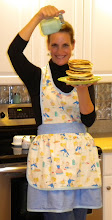
    (Wearing my Retro Revival 1940's Style "What's Cookin'?" apron)
5.  Add meatballs into sauce and finish cooking them (about 30 minutes).


OMG, I am not kidding.  Not exaggerating.  These are the best meatballs I've ever had!

Finally, I found the recipe for ah-mazing meatballs!  Seriously, I cannot stop thinking/talking about these and have already shared the recipe with a bunch of friends and family, insisting they try it!  The flavor is perfect and the texture!  Oh, the texture is, well, almost creamy!

In case you want to try my sauce, here's the recipe:


LUCILLE'S RED SAUCE
Ingredients:
1/4 cup extra-virgin olive oil
4 1/2 pounds Roma tomatoes
3/4 cup chopped garlic (about 2 heads)
4 cups diced onions (3-4 medium)
1 1/2 teaspoon salt
1/4 cup tomato paste (1/2 small can)
1 teaspoon dried oregano
1/2 cup red wine (or red cooking wine)
2 tablespoons red-wine vinegar
1/2 cups chopped fresh basil (or 1 tbs dried)
Freshly ground pepper, to taste (about 10 shakes)

Directions:
1.  Bring a large pot of water to a boil.  Place a large bowl of ice water next to the stove.  Using a sharp knife, core the tomatoes and score a small X into the flesh on the bottom.


2.  Place the tomatoes in the boiling water, in batches, until the skins are slightly loosened, 30 seconds to 2 minutes.
3.  Using a slotted spoon, transfer the tomatoes to the ice water and let sit in the water for 1 minute before removing.


4.  Place a sieve over a bowl; working over it, peel the tomatoes using a paring knife, and let the skins fall into the sieve.
5.  Halve the tomatoes and scoop out the seeds with your finger or a teaspoon, letting the sieve catch the seeds.  Press the seeds and skins to extract any extra juice.  Coarsely chop the tomatoes and set aside.
6.  Heat oil in a large pot over medium heat.  Add garlic and cook, stirring constantly, until fragrant and just beginning to color, 2 to 3 minutes.   Add onions and salt, stir to coat, cover and cook, stirring often and adjusting heat as necessary to prevent burning, until soft and turning golden, 10 to 15 minutes.  Stir in tomato paste and oregano and cook, stirring often, until the tomato paste is beginning to brown on the bottom of the pan, 2 to 4 minutes.


7.  Pour in wine and vinegar; bring to a simmer, scraping up any browned bits with a spoon.  Cook until reduced slightly, about 2 minutes.  Add the tomatoes and any juice; return to a simmer, stirring often.  Reduce heat to maintain a gentle simmer and cook, stirring occasionally, until the tomatoes are mostly broken down, about 25 minutes.  Remove from the heat; stir in basil and pepper.  Transfer the sauce, in batches, to a blender or food processor.  Process until desired consistency.  For a smooth sauce, puree it all; for a chunky sauce, puree just half and mix it back into the rest of the sauce.


8.  After the sauce has simmered for about an hour, you may need to add some salt and sugar, I added 4 heavy shakes of Lawry’s and 1/4 cup of sugar.
9. Enjoy!


Do you have a delish spaghetti and meatballs recipe?  I'd love to hear from you ~ leave a comment here and you're automatically entered for a chance to win this month's blog giveaway:


Drawing is March 31st.  Good luck!

Thursday, March 17, 2011

Wash, Dry, Fold, Repeat


Recently my mother gave me a huge stash of her old linens - yay!  Most of them originally belonged to her mother, my grandmother Lela Rosie, and I am thrilled to have them.  One of my favorites is this vintage clothespin keeper:


It now hangs in my otherwise "average" laundry room.  Average I say because it's so small and lacks an adequate amount of storage.  Despite its shortcomings, I've done my best to make it a cheerful place:

(Painted it a celadon green and added a colorful rug)


We hung a bunch of kitshcy laundry signs ~ they make me smile:

(Sporting Retro Revival's 1950's Style "Tuity Fruity" apron)

(Had to have the one on the bottom - looks like Twyla!)

And switched out the knobs on the cabinets:


One fine day, my dream laundry room will look something like this:

(Jackie Terrell designed this space for House Beautiful)

It will be huge!  With a big table for folding laundry and big enough to set up my ironing board, which by the way, I use so often that it's usually set up in my kitchen ~ ugh!

It will also be brightly colored.  Not a fan of wallpaper, I can stencil the walls to mimick this beautifully decorated laundry room:

(Photo from Cottage Living)

Oh, and my dream laundry room will also feature a fabulous chandelier, maybe like this one I found on http://www.betterhomesandgarden.com/:


Why not, right?!

Until then, I've got a few loads waiting...


(Modeling my 1950's Style "Beat It" apron.)

I've had several of you ask where I buy my fabric.  Of course, my vintage fabric aprons are made with found 1950's tablecloths but I find a lot of my new fabrics at J&O Fabric Store.  J&O has an amazing selection of fabu fabrics ~ like the one I used for my "Beat It" apron ~ much greater than most retail stores.  Check them out and I'm sure you'll find many irrestible!

Do you have a fabu laundry room?  Do tell!  Here, of course, and you'll automatically be entered to win this month's giveaway!


Each of your comments counts as one entry and if you mention my giveaway on YOUR blog, you'll get an extra five entries!  Good luck:)

Tuesday, January 25, 2011

Amusing Myself!


I'm always looking for creative ways to help advertise my business and sometimes (well, maybe more often than not?), I get a little dramatic!

Paul shot these pix recently...

Does mopping the floor make you feel mopey?


Brighten the task by wearing a Retro Revival apron!

(My new "Classic Kitchen" apron, featuring 1950's kitchen icons in pink and aqua.)

Cheesy enough?  Hahahaha!  We had fun with this.  And fair warning, we shot LOTS more - of other household chores.  Check back, I'll post more soon!

And here's a closer look at the dress I'm wearing, that I bought from my friend Becky's tag sale (check out her blog at http://sewinstitches.blogspot.com/):


Isn't this GORG?!  It's my new, favorite frock!  An authentic, 1950's dress!

For a chance to win this month's free blog giveaway leave a comment on this or any of my January entries.  I'll draw a winner on the 31st.  Good luck!

Tuesday, January 18, 2011

Sweet & Bitter


When it is dark enough, you can see the stars.  ~Ralph Waldo Emerson

Ah, Ralph, you remind me to embrace the positive.  Cue the wa wa wah sounds as I Debbie Downer for a moment...

My mother's not been well, really for most of her life, but for the past six months she's gotten much worse.  Long story short, I traveled to California last week (where my family is orginally from), met my sister (she's in San Diego) and drove to Bakersfield to move my mother into a nursing home, sell her house and settle all of her affairs.

(Meet Marilyn!)

I'm back home in Florida now, trying to process everything.  Exhausted.  In shock.  Very sad.  But, feeling pretty good that although I am so far away from her, my mother is in good hands.

Before the "darkness" had a chance to overwhelm me, the "stars" were shining.  Two days after I arrived home, we celebrated a most wonderful event...

My son's wedding!


Davey met Yujin on his first tour of Korea almost three years ago.


True love.  Super long-distance dating.  And now, forever love!  They were married at the court house near our farm and will return to Korea for a formal wedding sometime next year.


A special shout out to my friend Jennifer who made the lovely wedding cake!  Pound cake with buttercreme filling - yum!

Here she is, in her Retro Revival "Let Them Eat Cake" apron, displaying the practice cake:


Jenn can help you out with your cake and cupcake needs; check her out at Cupcake Jennie.

I am so happy and imagining nothing but the best for Yujin and Davey.  Here's to shinning stars!


Please leave a comment on this post, or any of my January posts, for a chance at winning this month's free blog giveaway:


Drawing is January 31st.  Good luck!